Create your own Easter bunny gift box
- Read time: 3 minutes
- Written by: Louise Brown
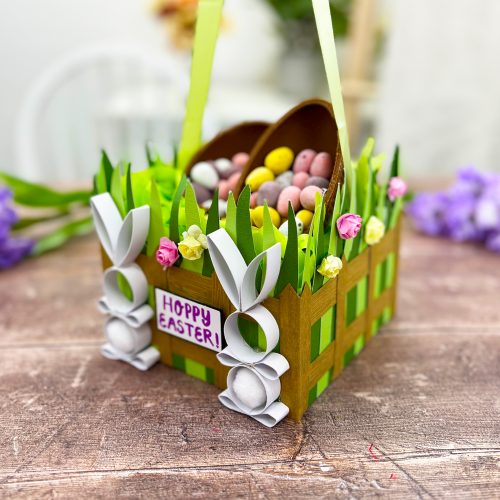
With Spring and Easter on their way, now is the time to get your seasonal crafts in order. We’ve created an adorable bunny-themed gift box which is ideal for gifting friends and family and is the perfect addition to Easter Egg hunts!
Follow our step-by-step guide below to create your own.
| . |  |
. |
You will need:
Foam Pads
Guillotine
Scoreboard and Scoring Tool
Acetate
Foil transfers
Craft knife
1 pc metal Brad
White and Pink Card
Creating your box
Take your largest circle die and die-cut a circle from Mount Board. This will become the back of the box later on.
Take the same die and add a smaller die to the middle of it creating about ¾ of an inch ring. Repeat the step until you have 5 rings.
Take one of the rings and add foam pads around the edge.
Take the same die and add a smaller die to the middle of it creating about ¾ of an inch ring. Repeat the step until you have 5 rings.
Take one of the rings and add foam pads around the edge.
 |
 |
 |
Take the next ring and stick it on top. Place foam pads at alternating points around the ring and repeat this until you have all 5 rings stuck together.
Cut a strip of paper the width of the ring plus 1 inch. Score down each long edge at ½” mark and then make slits every ½” up each side.
Wrap this around the outside and inside of the ring using the flaps to adhere to the outside and inside of the ring. Make sure to use a strong adhesive like red liner tape.
 |
 |
 |
Bring back your large circle from step one. Using the same die and a piece of patterned paper, die-cut another circle.
Cut a semi-circle about two-thirds of the way up. Score a line across the bottom of the semi-circle and gently fold backwards – this will become a hatch to add the sweets.
Add a small metal brad to the hatch for easy opening.
 |
 |
 |
Using the same 2 dies for the rings earlier cut out a piece in patterned paper. Then cut out a circle of acetate the same as the back panel and with some foil transfer lettering add the letters to the front of the acetate.
Assemble the box as follows:
Back panel with hatch face up
Ring on top
Acetate foiled panel on top
Patterned paper on top
Assemble the box as follows:
Back panel with hatch face up
Ring on top
Acetate foiled panel on top
Patterned paper on top
 |
 |
 |
Take some white and pink card and cut 2 semi-circles out with the pink slightly smaller than the white. Mat and layer – These will be the feet.
Take some more white and pink card to create bunny ears with the pink smaller than the white. Attach the ears to the back of the box making sure not to cover the hatch and the feet to the front of the box as this will stop it rolling.
 |
 |
 |
Fill up your easter box with easter treats and enjoy!
--
Share your Easter makes with us on Social Media!
Follow us on Facebook, Instagram, LinkedIn, or TikTok and join our private Facebook group to chat with crafter's alike!